Technical Aspect:
In terms of technical advancements, we’ve successfully integrated a touchpad system and a NeoPixel ring into our project. The configuration consists of four touchpads paired with a single NeoPixel ring, assigning each touchpad a unique color. When multiple touchpads are simultaneously activated, the NeoPixel ring produces a harmonious blending of colors.
We utilized a wiring setup connected to A1, A2, A3, and A4, expanding the electric conduction area using copper tape. This design ensures that touching any part of the area results in a printed value, offering a response for us to check if it is working correctly.
Following the initial setup, we conducted tests to identify which pin (A1, A2, A3, and A4) had been triggered. Utilizing a conditional “if” statement, we programmed the system to illuminate the NeoPixel ring corresponding to the specific area of the touchpad activated. Hitting the side of the touchpad and the center of the touchpad results in different light responses. When hitting two areas together, the light integration happens with the NeoPixel ring. This step ensures seamless integration with the ring based on the user’s interaction with the touchpad.
For further development, we will work on adding a sound element to the gamified interaction with the two drums. Including constructing a pattern when the tempo of the two drummers matches, we will activate sound feedback. We are also planning on making the different effects of the areas on the touchpad more distinct. For example, hitting the center of the touchpad will let the light shine a little longer while hitting the side will let the light shine shorter. In the next weeks, we will be working on the stabilization of performance as well as integrating some designed interactions into the project.
Design Aspect:
Date 3D Printing
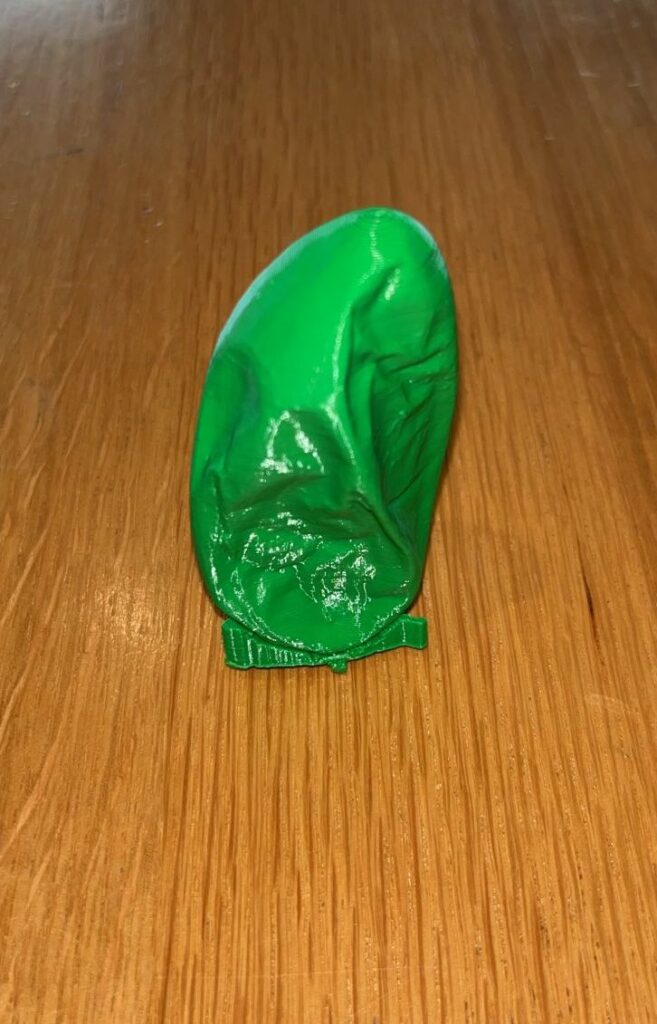
For the design of the date cluster, we began by finding a design template for a single date. Using Tinkercad we adjusted the size and printed it out to see if the design would work for us before creating and printing a whole date cluster. Due to booking issues, we were only able to print using the CAT 3D printer in the library which only printed using solid filament and not translucent material. However, our main goal was to get an idea of the design details and shape of the date. As shown in the image, the model and size of the date came out as we expected. To proceed with this design we created a 3D model in Tinkercad of the date cluster that will be placed in the date basket. The model still needs a few tweaks in terms of shape. After we add the final touches to the date cluster 3D model we will proceed to print it with translucent material.


Rapid Prototype
We started by making a cardboard prototype to fit inside our date basket. The prototype is split into two layers: the bottom layer, which will house our circuit board, battery, and most of the wiring, and the top half, which has the neopixel ring light. In the final version, we will have a 3d printed model of dates which will be translucent and act as a diffuser for the light underneath, it also doubles as a “lid” which covers up most of the wiring. Since the date basket is made of straw, we plan on making some small holes at the bottom which will have connectors that connect the circuit board to the drums.
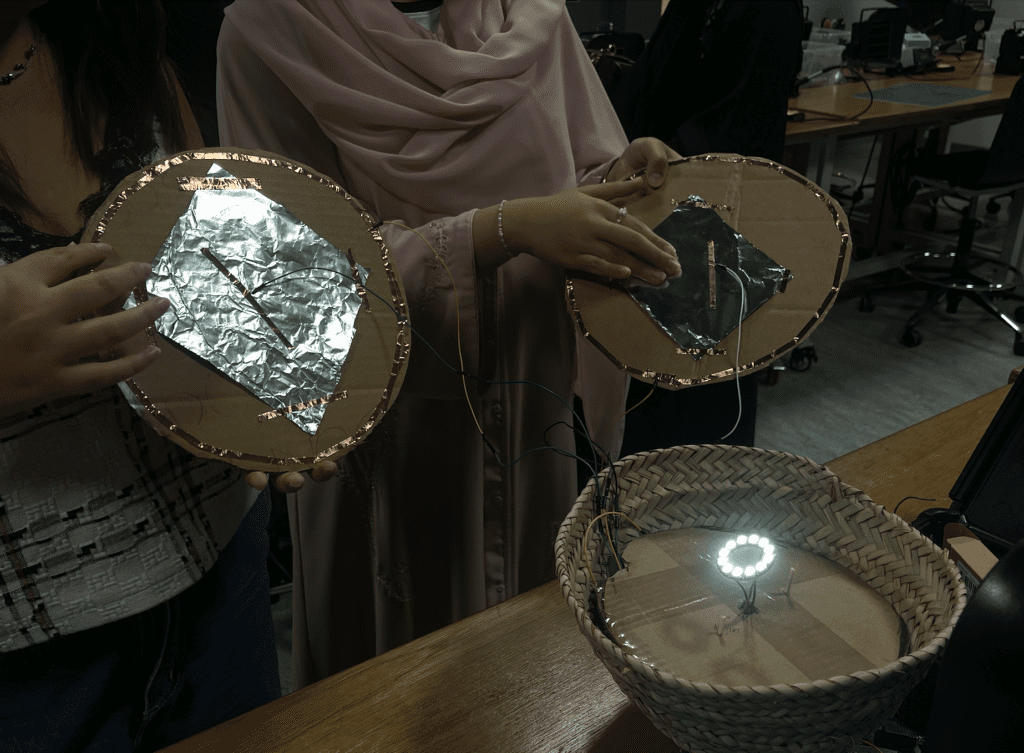
We made touch sensor prototypes for the drums out of copper tape and aluminum foil stuck onto two circular pieces of cardboard. The current prototype has two different light colors on the neopixel ring for each of the two drums – one color when the user touches the outer edge and a different color for the middle. The colors blend together when more than one is touched, and it currently turns white for most blends. Our next step is to pick colors that will blend into a third color other than white, and to integrate sound outputs into the experience, as well as selecting the instrumentals that will play as the installation takes place.