Overview, Prototype and Field Installation updates, Documentation Video behind the scenes
By Armaan Agrawal, Injoo Kang, Amy Kang, Sri Pranav Srivatsavai

Name
We named it! It’s now Arth-E (to be featured as Anxious Arth-E soon).
Inspired from WALL-E
Features
- Scale of the robot
- The size of the robot is intended to be on a small scale to mimic the small sizes of arthropods in the desert.
- The size of the motors are large so we had to alter our ideas a little to accommodate both the concept and the logistics.
- 3D printed legs
- The wheggs are the most important element of Arth-E. Inspired by Wheggo, the double sided wheggs enable the robot to move both forwards and backwards. Being one of the most important elements that drives the robot, these wheggs are 3D printed with PLA to stand the weight of itself, and be able to pass the obstacles without any problems to the whegg itself. Although the process included 4-6 iterations of the wheggs, the final wheggs are strong and sturdy, giving Arth-E the perfect legs.
- Laser Cut body
- Arth-E was designed to mimic the arthropods and hence, it made sense for us to make a tapered body and not something linear or simple. Hence, we laser cut a not very thick piece of wood to attain the tapered shape idea we have while at the same time accommodating the sizes to fit the breadboard, battery and motors.
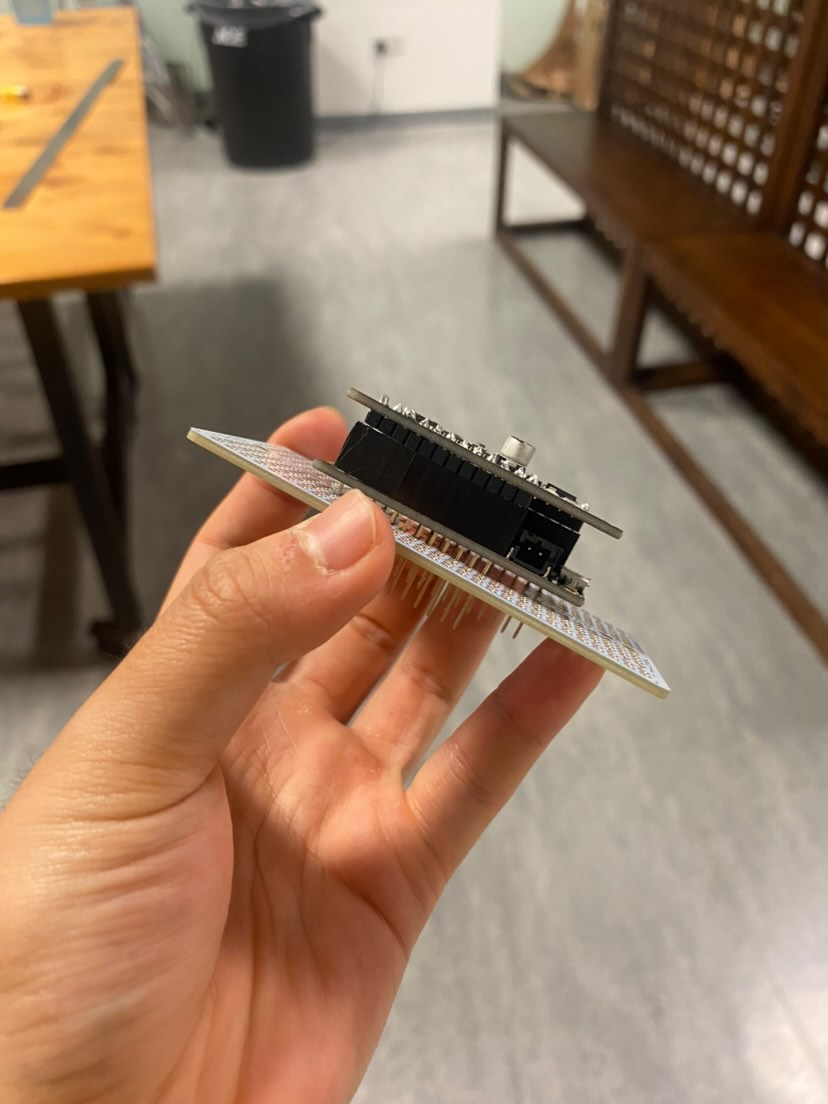
- Soldered circuit
- We had the v.1 prototype ready and we observed that it looks quite messy with the wires all on the top. Hence, for our v.2 (final version) of our robot, we wanted to solder the wires to a new breadboard and reduce the clutter of the wires. There were a total of 4 iterations for soldering the breadboard since each had its own problem. Thankfully, the 4th iteration worked!
- Power backup from the battery
- We are using the power from ~2200 mAh battery. It is connected to the stepper board and powers both the stepper board and the M4 express.
- Burrow Design
- Used cardboard boxes and decorations to emulate a Wall-E theme

Assembly Process
- Laser cut / 3d print layer 1: Motors and Wheggs
- Wheel axes are different for the font and the back of the robot: to accommodate the tapered body, and to have an upper hand for either of the pair of wheggs
- Laser cut layer 2: Battery and Circuit Board
- Drilled and bolted the board to the body.
- Used velcro straps to keep the motors sturdy and immovable in all axes.
- Tape to stick the wires to the body since a few were popping out.
- Extended the legs of the light sensor to make it point outwards near the head of the robot in contrast to the tail where the board is fixed.
- Laser cut layer 3: [only for documentation] GoPro for PoV Arth-E
- Sensors used: Light sensor (Photoresistor) and Microphone (SparkFun Microphone Breakout)
Code
GitHub Code: https://github.com/sripranav9/ArtificalDesertArthropod/blob/main/v.Final/final.py