Our installation now combines light, sound, and sensor feedback in a way that feels cohesive with the metaphor of contrast between the two types of desert roses.
1. The inputs and outputs
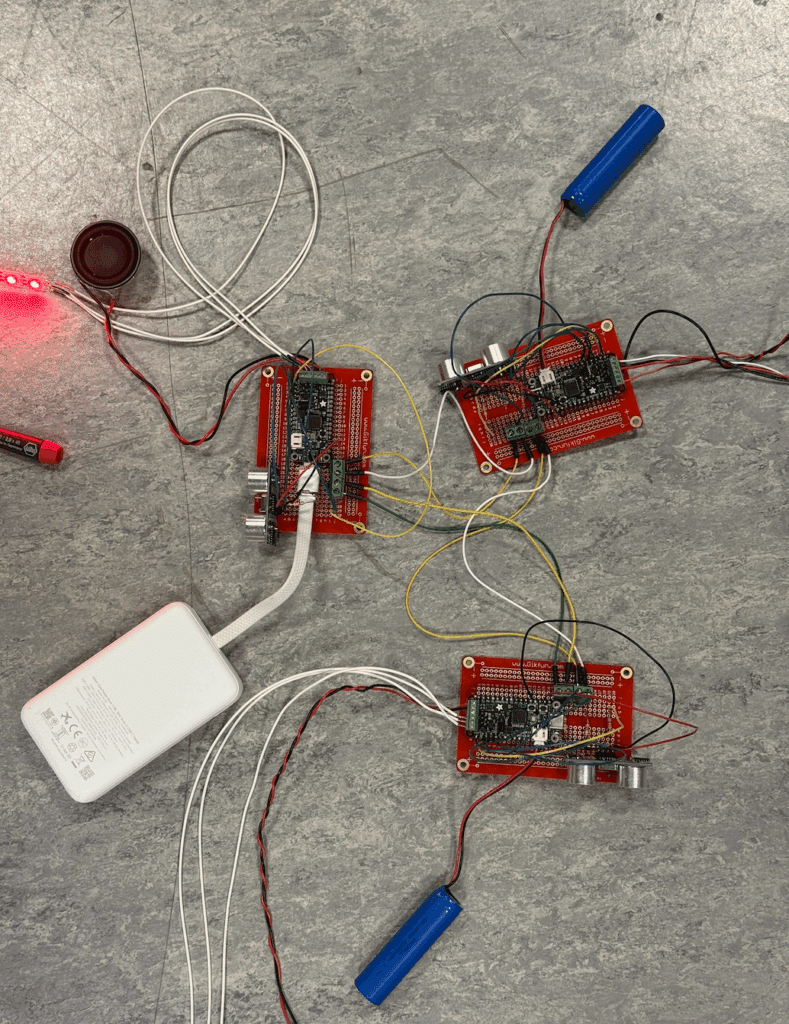
Our project uses two types of sensors for inputs: one central photosensor and three individual distance sensors embedded in each sculpture. The photosensor captures the ambient light in the space and triggers the installation’s transition from daytime to its sunset state. As the desert darkens, the roses begin to activate and light up.
The outputs are expressed through light, sound, and the internal communication signals shared across the three desert roses. Each rose contains Neopixel strips placed strategically along the hemispheres, so the light reflects softly across the entire form without overwhelming the viewer. The speakers embedded in each rose provide the other form of output; it shifts from healing ambient tones to more fragmented, glitchy sounds as interaction intensity increases. Apart from these sensory elements, the system also outputs real-time communication signals between the boards, allowing a single rose’s sensor reading to propagate to the others and create a coordinated collective response.
2. How does the interaction work?
Once a visitor approaches the sculptures, the interaction moves into the second layer. Each desert rose has its own distance sensor that detects proximity and sends that information to the shared network of boards driving the installation. The moment a user leans in or reaches toward a rose, that rose enters its first level of glitching i.e., subtle distortions in both lighting and sound. This behavior then propagates to the other two roses, creating a ripple effect as all three objects respond to the user’s presence. Continued engagement escalates this progression from level one to level two, and finally to level three, where all three roses enter a fully immersive glitch state with stronger light pulses, quicker sound shifts, and rapid visual noise. When the user steps back or becomes still, the system stabilizes and returns to its calm, crystal-like form.
An example of how it works in the code can be seen here, where the code first detects if someone is close. After a time threshold is met, it will start sending signals to the other boards (as seen in signal_pin_1.value = True and signal_pin_2.value = True) in order to make them start glitching in levels.
if (
                receiving_pin_1.value == True or receiving_pin_2.value == True
            ) and you_shall_not_pass == False:
                glitching_state = True
            else:
                glitching_state = False

            if (distance > 0 and distance < 68) and glitching_state == False:
                # After the glitching state condition has been evaluated, and this is not the one that is on a glitching state,
                # start the timer to create the effect.
                if not start_timer:
                    start_time = time.monotonic()
                    start_timer = True

                # Since this is not the one in a glitching state, it will keep track of the seconds until it reaches 10 seconds, where it will
                # "Synchronize" the rest of the boards.

                elapsed = time.monotonic() - start_time
                print("Seconds in range:", round(elapsed, 2))

                if elapsed >= 16:
                    # Load the glitching level 3 audio.
                    sound = level3glitch_audio

                    # I will synchronize EVERYONE!
                    signal_pin_1.value = True
                    signal_pin_2.value = True
                    you_shall_not_pass = True  # Do not override main circuit.

                elif elapsed >= 10 and elapsed <= 16:
                    # Load the glitching level 2 audio.
                    sound = level2glitch_audio

                    # I will synchronize EVERYONE!
                    signal_pin_1.value = True
                    signal_pin_2.value = True
                    you_shall_not_pass = True

                elif elapsed >= 1 and elapsed <= 10:
                    # Load the glitching level 1 audio.
                    sound = level1glitch_audio

                    signal_pin_1.value = False
                    signal_pin_2.value = False
                    you_shall_not_pass = False
The outputs across the system work together to amplify this effect. The Neopixels shift from warmer balanced tones to more intense pinks and whites, referencing the contrast between the healing properties of a desert rose crystal and the hallucinatory qualities associated with the plant. Each board also drives an individual speaker, allowing the glitching to feel spatial and distributed rather than coming from a single source.
An example of how this part of the interaction, where the colors shift and audio plays, can be seen in the following code segment. This code represents the case where the signal is sent to another board, and it starts glitching accordingly.
 elif distance >= 0 and glitching_state == True:
                if not start_timer:
                    start_time = time.monotonic()
                    start_timer = True

                elapsed = time.monotonic() - start_time

                if elapsed >= 1 and elapsed <= 10:
                    sound = level1glitch_audio
                    for i in range(0, 40):
                        pixels.fill((255 - int(i), 100 - int(i), 0))  # Dimming effect.

                elif elapsed >= 11 and elapsed <= 16:
                    # The audio.
                    sound = level2glitch_audio

                    # ---- #
                    pixels.fill((30, 255, 255))
                    pixels.fill((30, 255, 255))
                    pixels.fill((30, 255, 255))
                    pixels.fill((30, 255, 255))
                    pixels.fill((255, 30, 30))
                    pixels.fill((255, 30, 30))
                    pixels.fill((255, 30, 30))
                    pixels.fill((255, 30, 30))
                    # ---- #

                elif elapsed >= 17:
                    # The audio.
                    sound = level3glitch_audio

                    # ---- #
                    pixels.fill((45, 255, 255))
                    pixels.fill((45, 255, 255))
                    pixels.fill((45, 255, 255))
                    pixels.fill((45, 255, 255))
                    pixels.fill((45, 255, 255))
                    pixels.fill((45, 255, 255))
                    pixels.fill((45, 255, 255))
                    pixels.fill((45, 255, 255))
                    pixels.fill((45, 255, 255))
                    pixels.fill((255, 45, 45))
                    pixels.fill((255, 45, 45))
                    pixels.fill((255, 45, 45))
                    pixels.fill((255, 45, 45))
                    pixels.fill((255, 45, 45))
                    pixels.fill((255, 45, 45))
                    pixels.fill((255, 45, 45))
                    pixels.fill((255, 45, 45))
                    pixels.fill((255, 45, 45))
                    # ---- #

                # Make sound
                global_volume = 1.0
                cooldown = (
                    10.0  # Cooldown has to be 0 preferably to avoid a silence gap.
                )

                if sound:
                    now = time.monotonic()
                    # Play sound if there is a new audio file and the cooldown has finished.
                if sound != last_played or now - last_play_time > cooldown:
                    mixer.voice[0].play(sound, loop=False)
                    mixer.voice[0].level = global_volume
                    last_played = sound
                    last_play_time = now

            # -----------------------------------------------
What is good about this type of interaction is that the communication between the boards ensures that each rose behaves as part of a collective experience rather than an isolated piece.
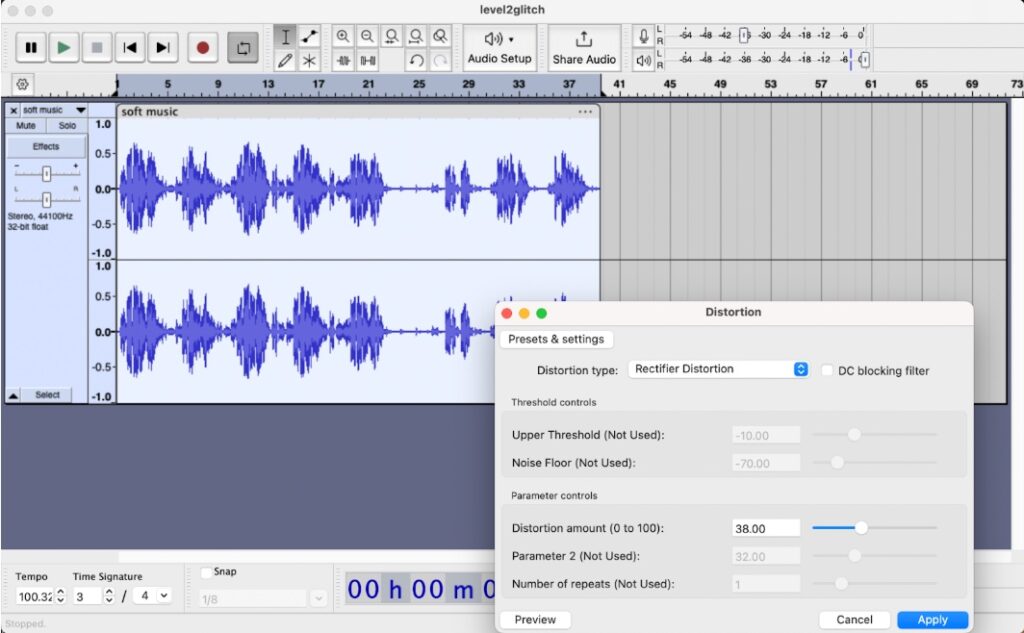
3. Audio Editing
As for the audio editing, we exported two audio files and then used Audacity to layer the audio files and add some effects to intensify the glitchy feel such as Distortion, Reverb, Hard Clipping, Overdrive etc. Credits to original files can be found below.
4. Design and Fabrication
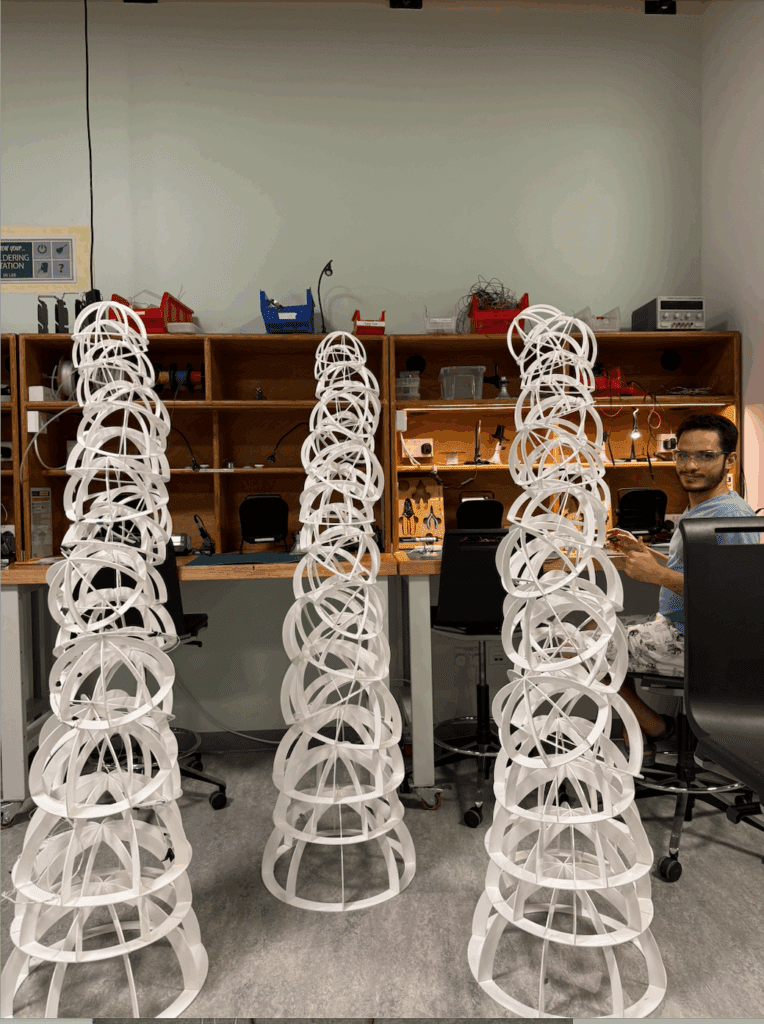
After prototyping with cardboard and briefly considering plywood, we ultimately chose 3 mm white acrylic for the final build. We laser-cut the sheets into circles for the bases and quadrants for the ribs, which were first assembled with super glue, reinforced with baking soda to speed the bond, and finally secured with acrylic welding solution for durability. The decision to use white acrylic came from how well it diffuses light, its ability to stand out naturally in a desert environment, and the slightly fragile quality that fits the overall concept.
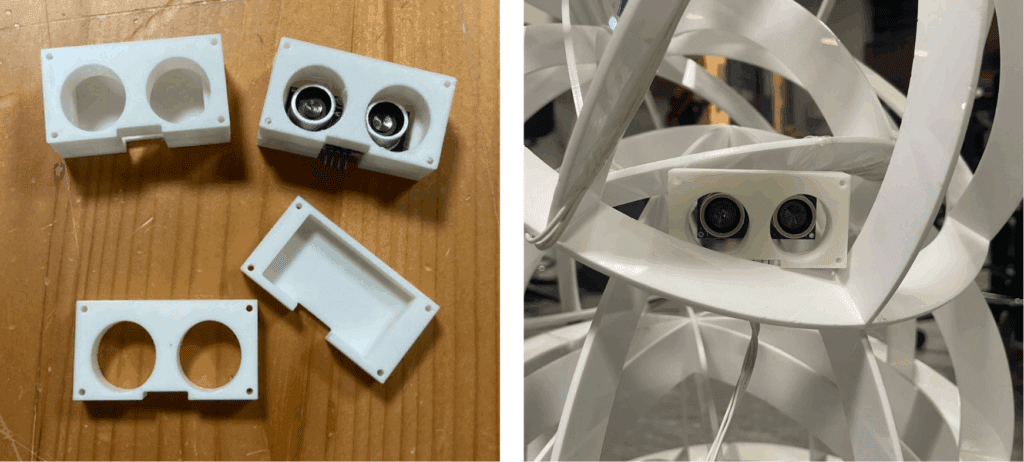
Once the individual hemispheres were cut, we constructed the full forms by tying the different sizes together using strong fishing line. We decided not to use any central poles or fixed internal structures because they disrupted the organic, layered aesthetic we were aiming for. To house the boards and route the wiring cleanly, we added a white plastic hemisphere enclosure near the base, drilling small holes for sensors and cables to pass through without visually breaking the form.
5. Files used:
a. GitHub repository:
The following GitHub repositories contains all the necessary files to make the project work, given that the Adafruit Feather RP 2040 board is formatted with CircuitPython and has enough storage.
Link: https://github.com/marcosnigp1/DesertFlowerIllusion
b. 2D Designs — Laser Cutting files:
Link: https://drive.google.com/drive/folders/1j_BCGl87cdX2XV3nq1sm_Mptr8scPxSF?usp=drive_link
c. 3D Design — Distance sensor holder file:
This was mainly done with the web software Tinkercad.
Link: https://drive.google.com/drive/folders/1IuiDKnflMi5tUSoUoDMc6aerTYkvQXSD?usp=drive_link

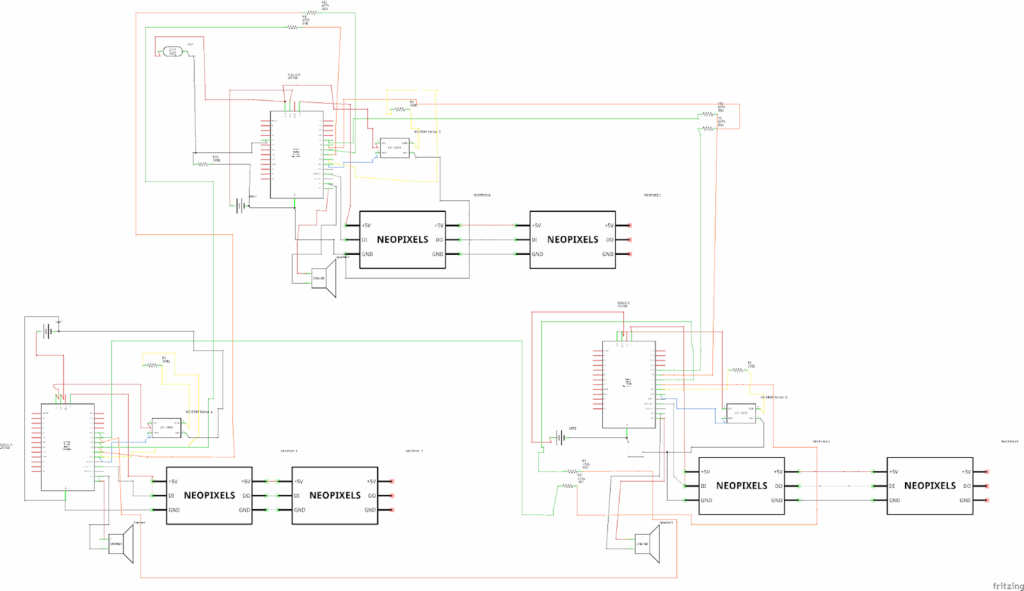
d. Schematic:
As seen in the schematic, it encompasses the three boards connected, with each one having their own setup of devices. It is recommended that this is seen in its original file to be able to distinguish more clearly the small details and the connections.
Link: https://drive.google.com/file/d/1DYPKDlBLSsoraVtU6fCkcZztArzpfQ5B/view?usp=drive_link
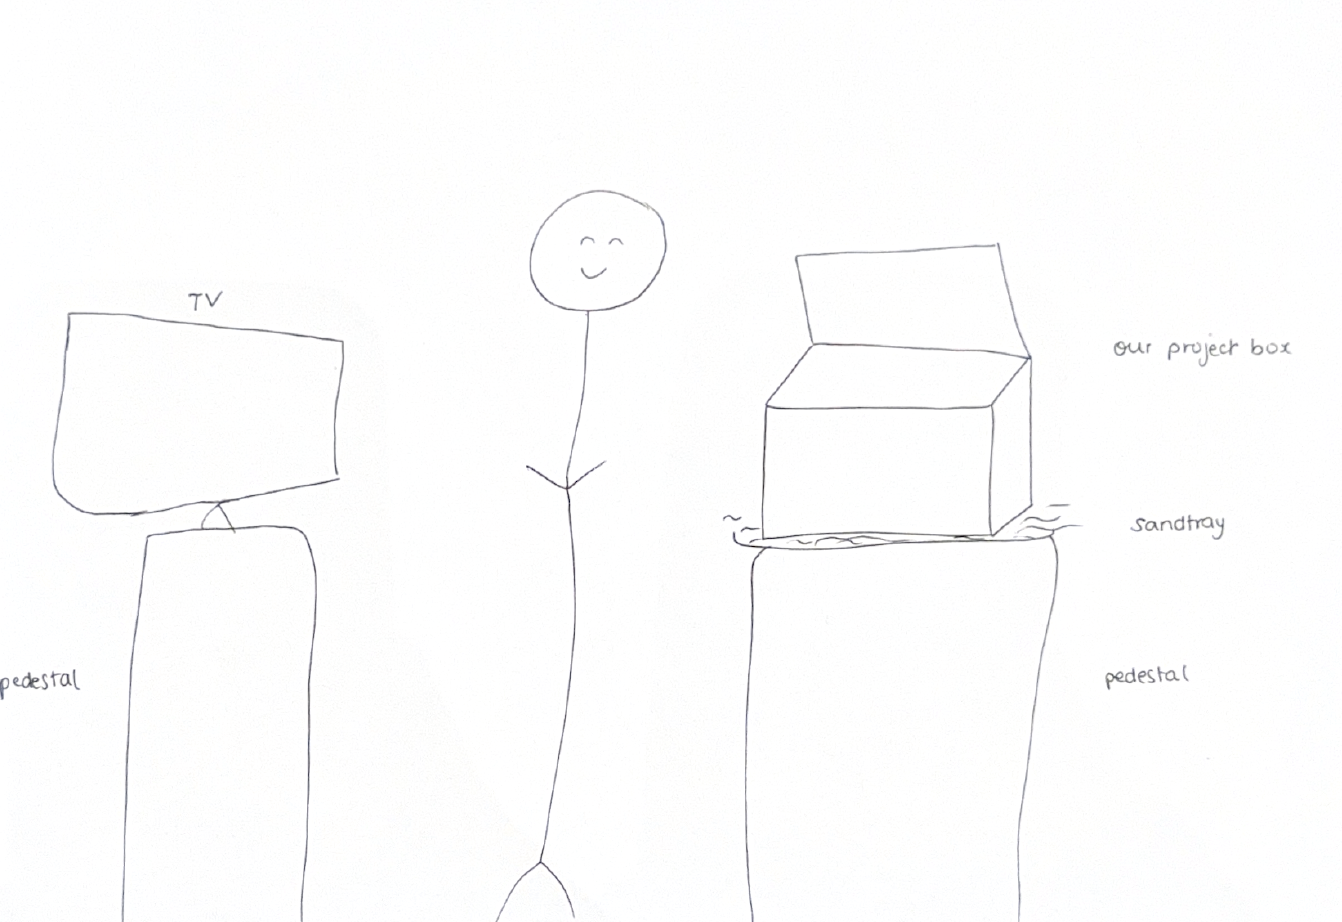
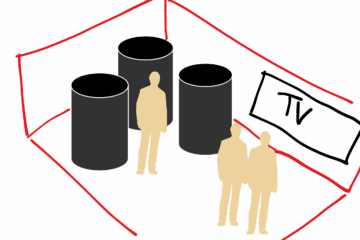
6. Pictures showing Technical details and Fabrication of the project
Small video example of the glitching:
7. Credits:
Used audio files:
Glitchy audio by hotpin7 — https://freesound.org/s/820020/ — License: Attribution 4.0
soft music.mp3 by ZHRØ — https://freesound.org/s/535934/ — License: Attribution 4.0