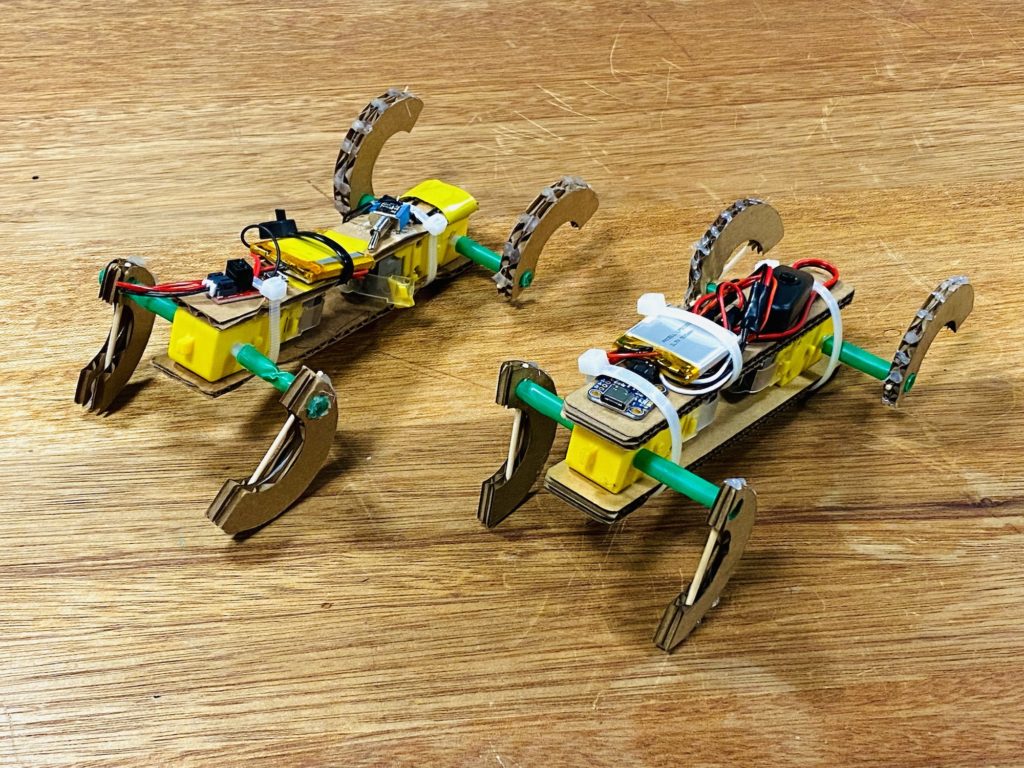
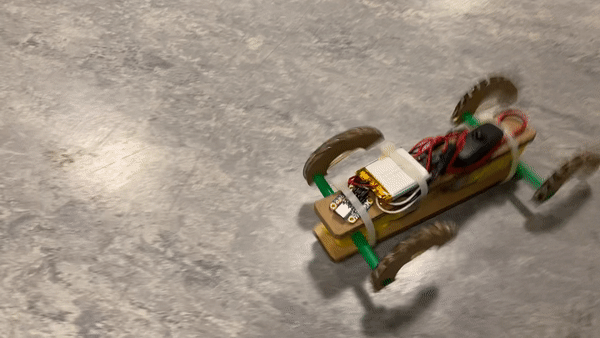
Follow the tutorial to build your own Wheggo v1!
Step 1. Motor Circuit
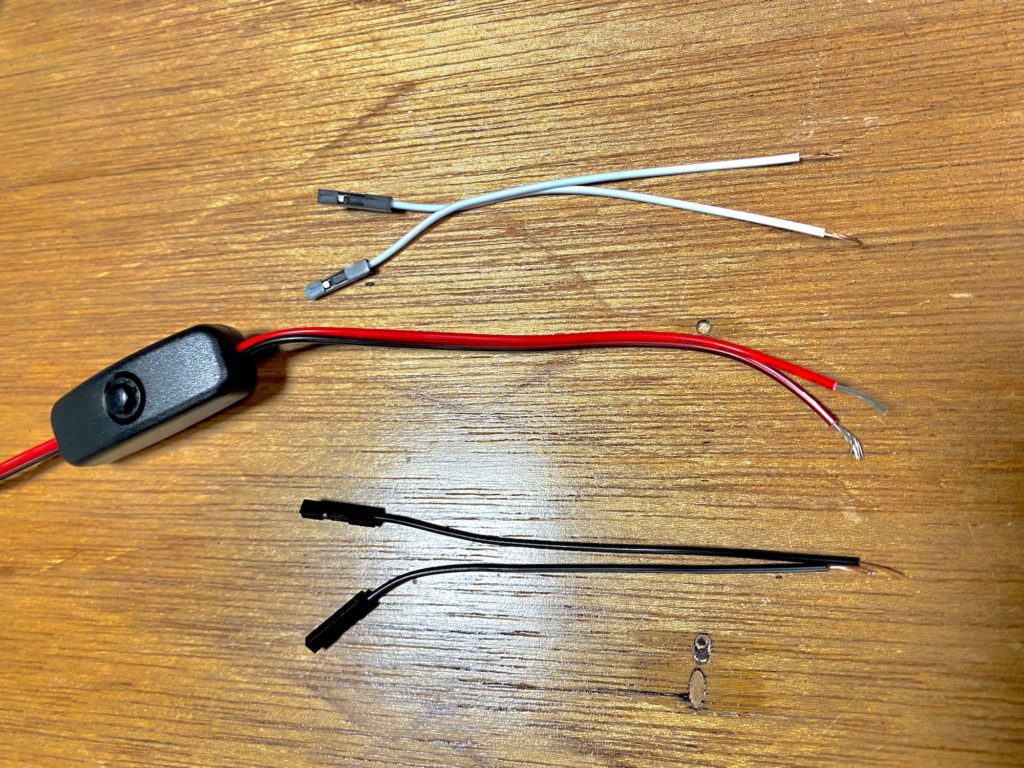
1. Cut one side of the 2 pin extension cable, strip the tip of the wires.
2. Cut the two female/female jumper wire in half. Now you have four one-end female wires. Stirp the tip of the wires.
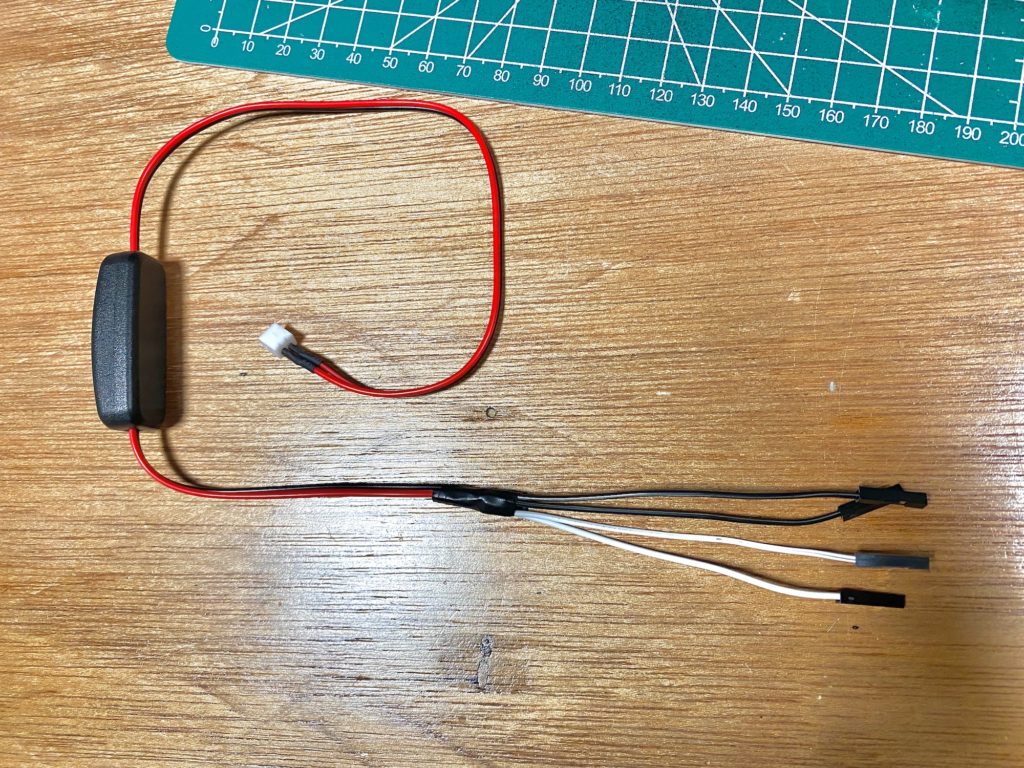
3. Solder two female wires to one extension cable. Make sure to mark the polarity of the cables.
4. Use electric tape to protect the soldering points. Make sure you tie up each polarity separately.
5. Tie the two branches of wires together. You may put some strength when tying the tape to prevent the connection from breaking.
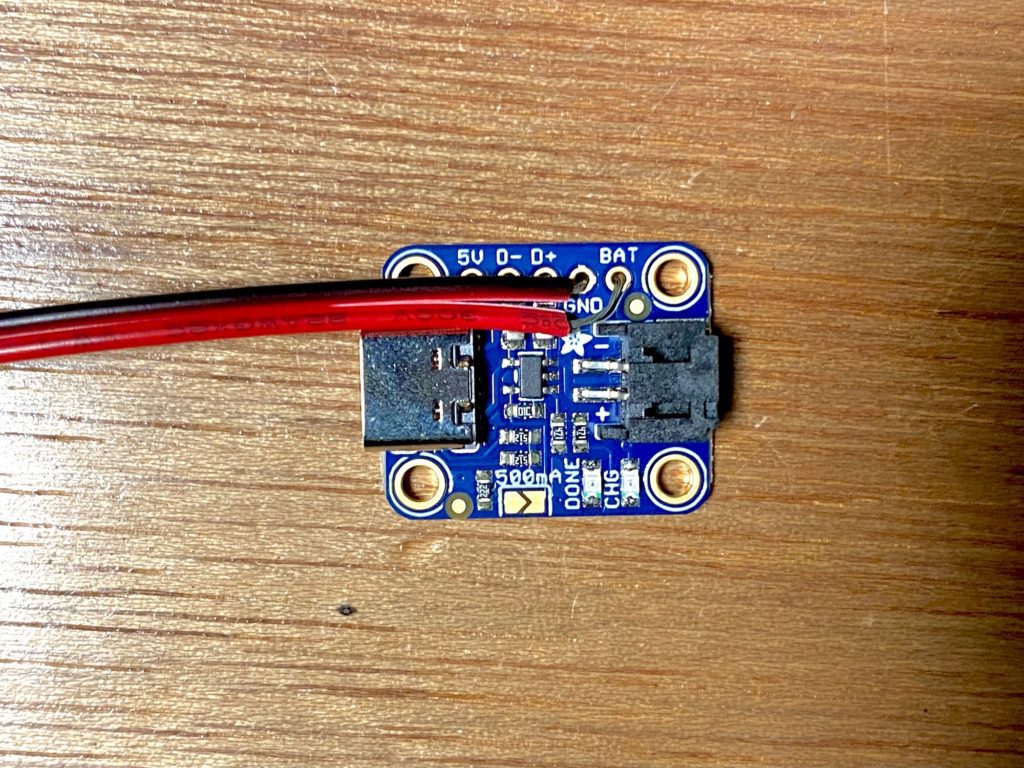
6. Cut the other end of the 2 pin extension cable. Strip the tips.
7. Solder the cables onto the Micro-Lipo charger board. The positive wire goes into the BAT hub, and the negative wire goes into the GND hub.
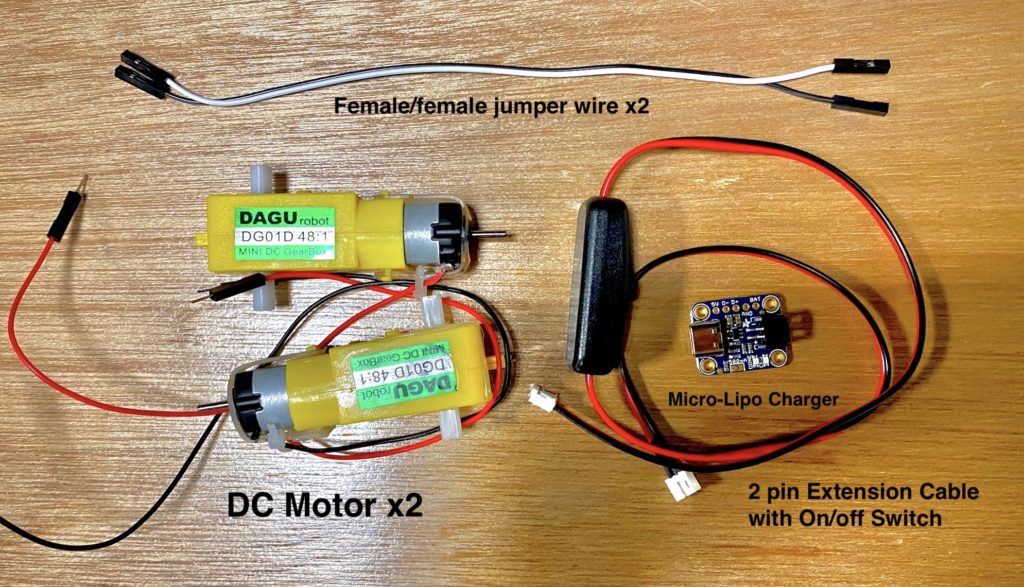
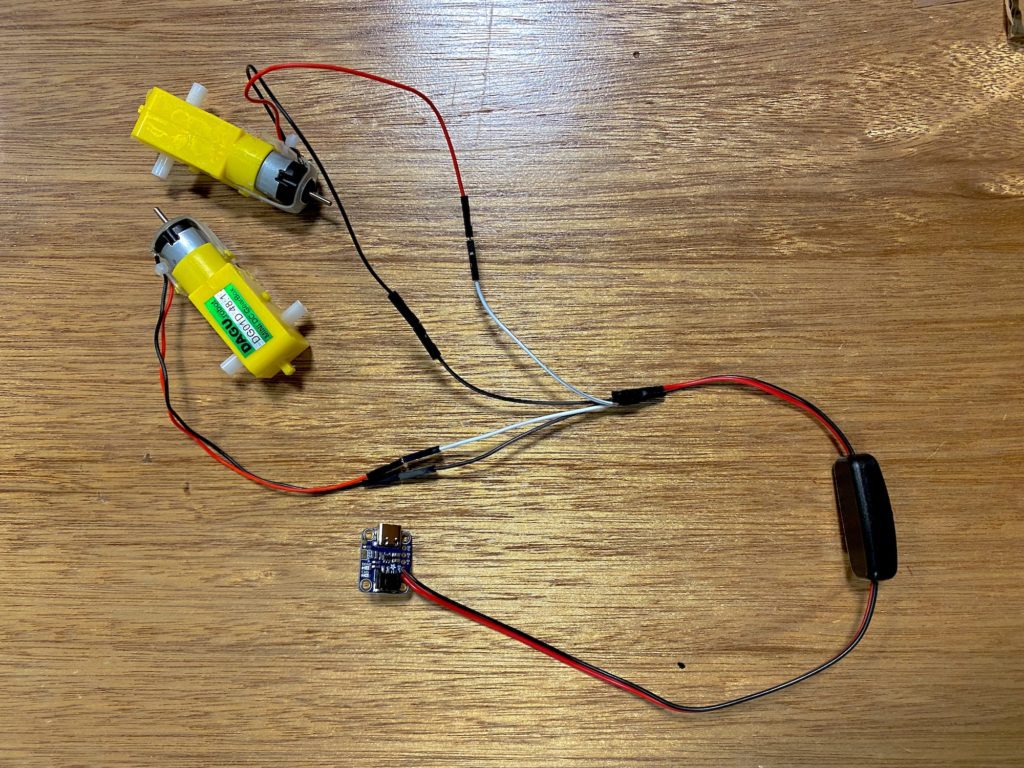
8. Connect the four female jumper cables with the DC motors.
Motor Circuit Complete!
You may test the motors and your solder joints by connecting the circuit to a battery.
Step 2. Frame
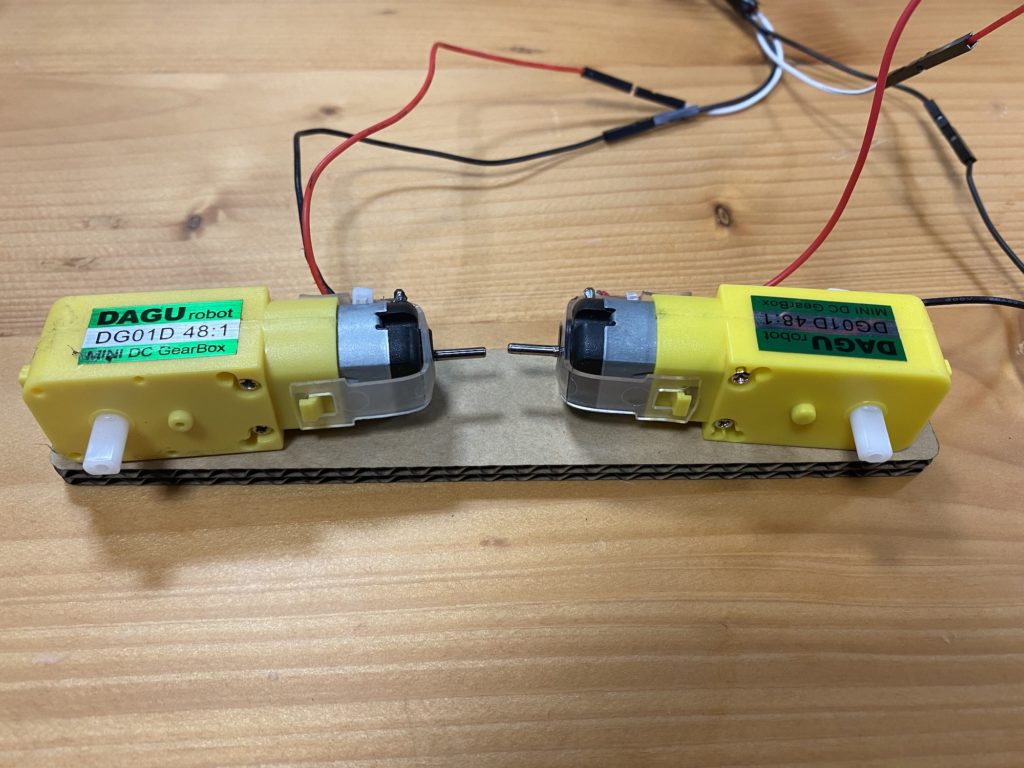
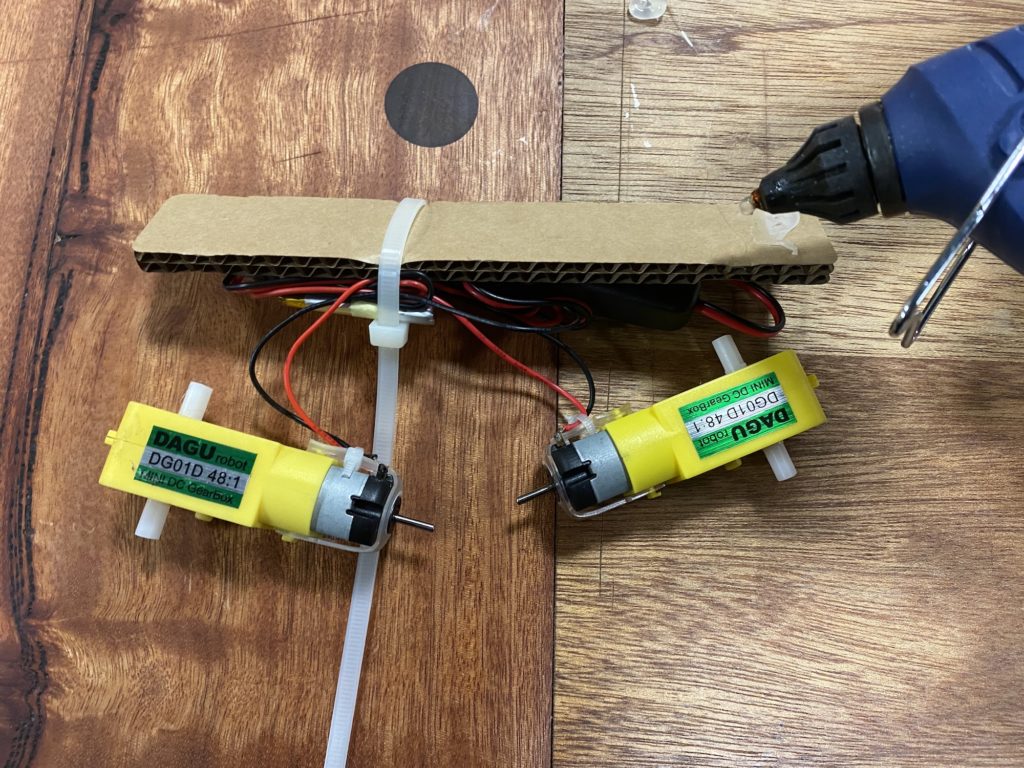
1.There are two plates for Wheggo. Put the motors onto the bottom plate to estimate the positions. Make sure the motors are facing each other as the image shows.
2. Connect the motor circuit to the battery, check the spinning direction of the motors. Mark the front and the back of Wheggo.
3. Now take out the second plate as your top plate.
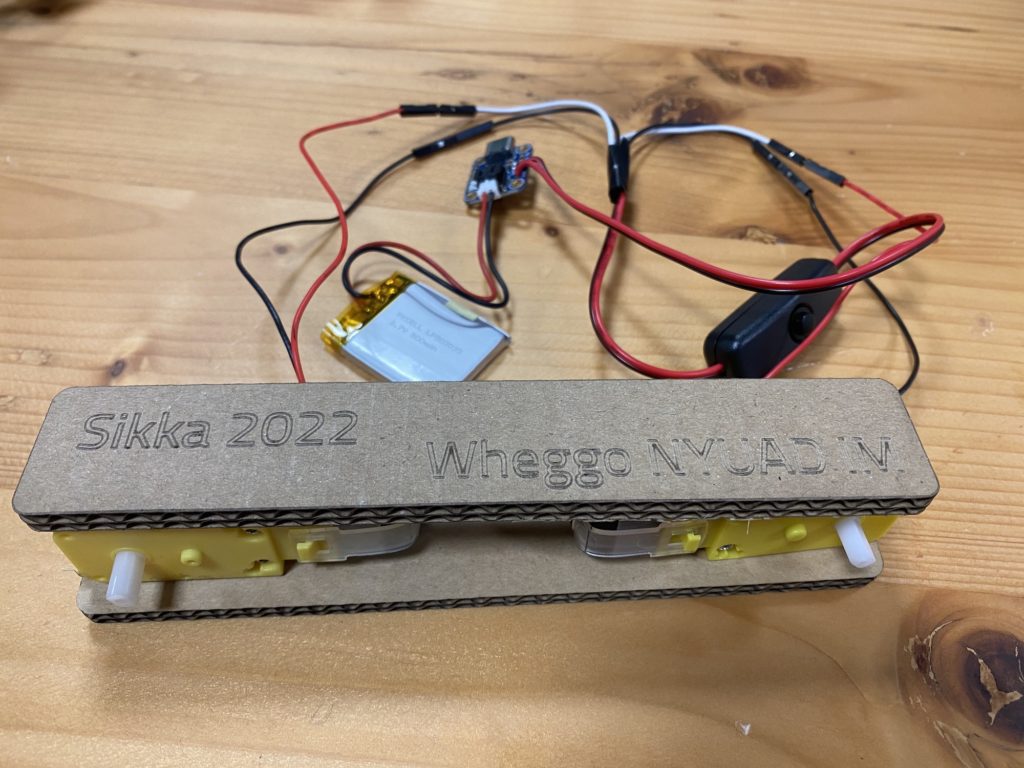
4. Align the charger board, the battery, and the switch (front to back) on the top plate.
You may find excess wires on sides of the plate. Organize them properly and hide them under the battery.
5. Use a zip tie to tie the battery and the wires onto the top plate, secure the wires won’t go loose.

6. Apply some glues to the bottom side of the top plate. Stick the motors onto the top plate. Make sure they are in the right positions and horizontally aligned.
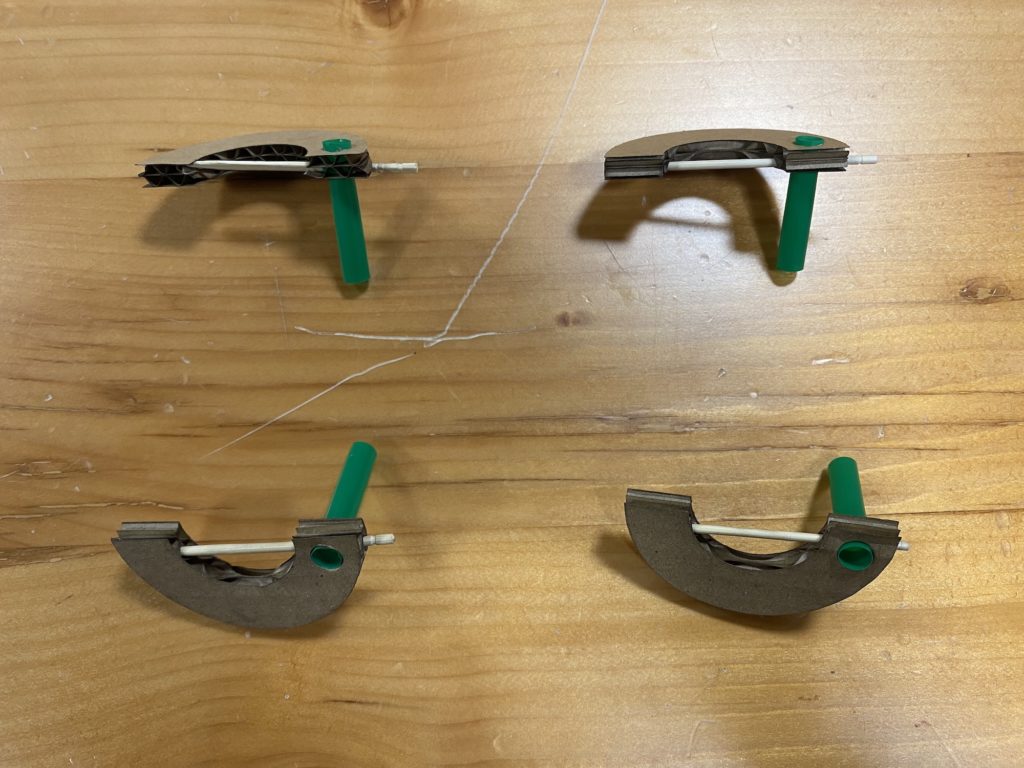
Step 3. Wheg
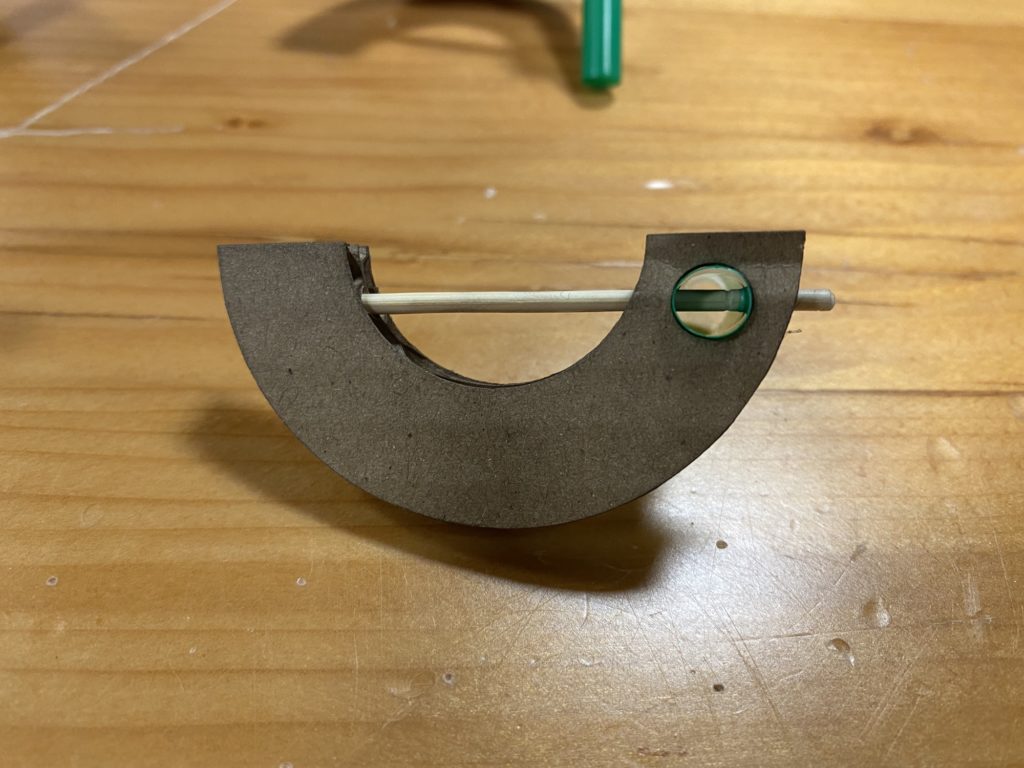
1.Cut the straw into four 3.5 cm pieces.

2. Put the Whegs onto the straws.
Pay attention to the directions of the whegs.
3. Stick the toothtick through the the side of the wheg and the straw.
To prevent the straw from collapsing, you may predrill the straw before connecting it with the wheg.
4. Repeat the process to all whegs. Break the excess tips of the whegs.
Be careful in case of injury, and pay attention to the direction of the whegs!
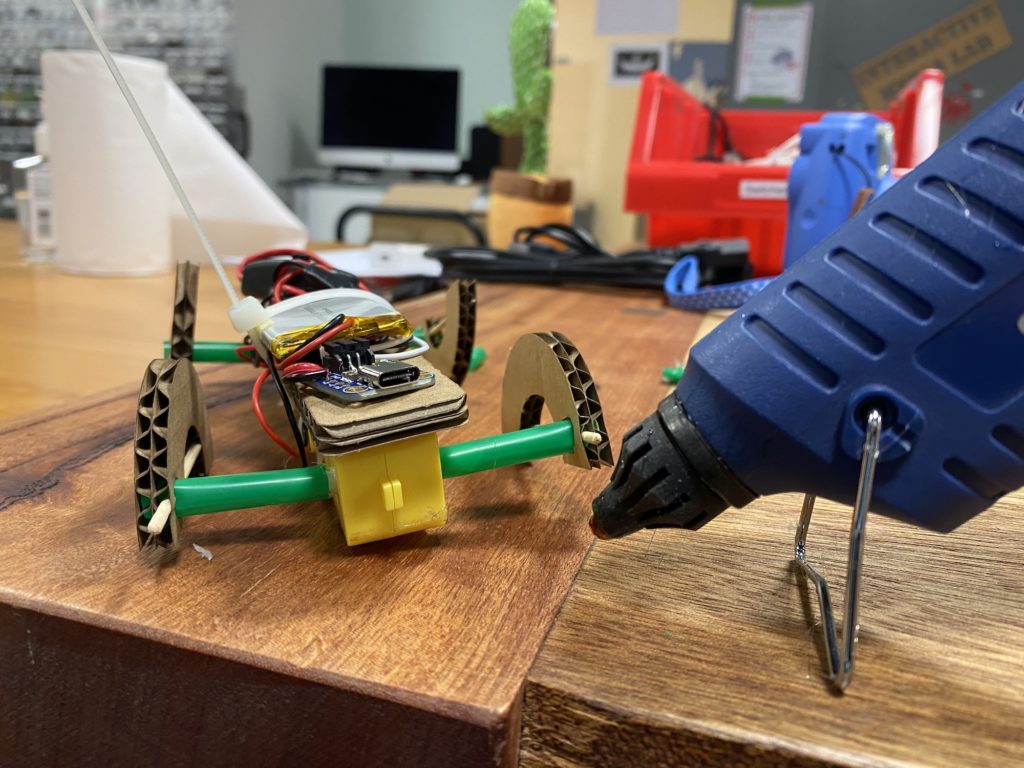
Step 4. Assembling
1.Fill a little bit of glue into the tip of the straw.
2. Attach the wheg to the shaft. Hold the wheg in place until the glue solidify.
Make sure the straw is horizontal to the ground and it won’t wobble while spinning.
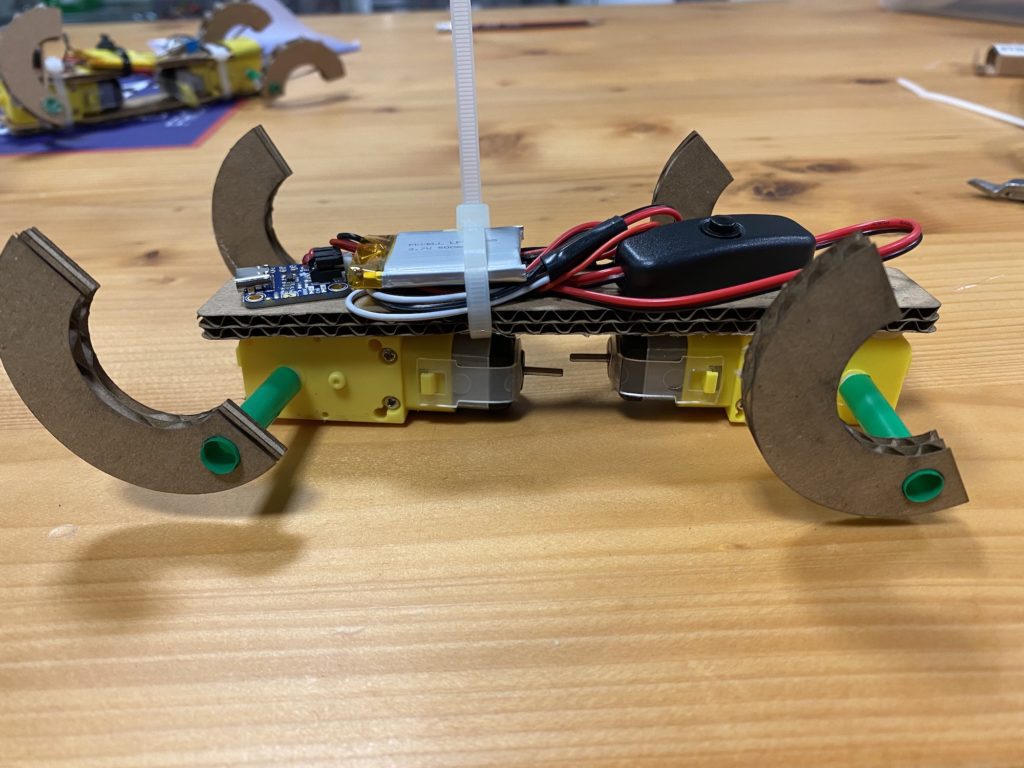
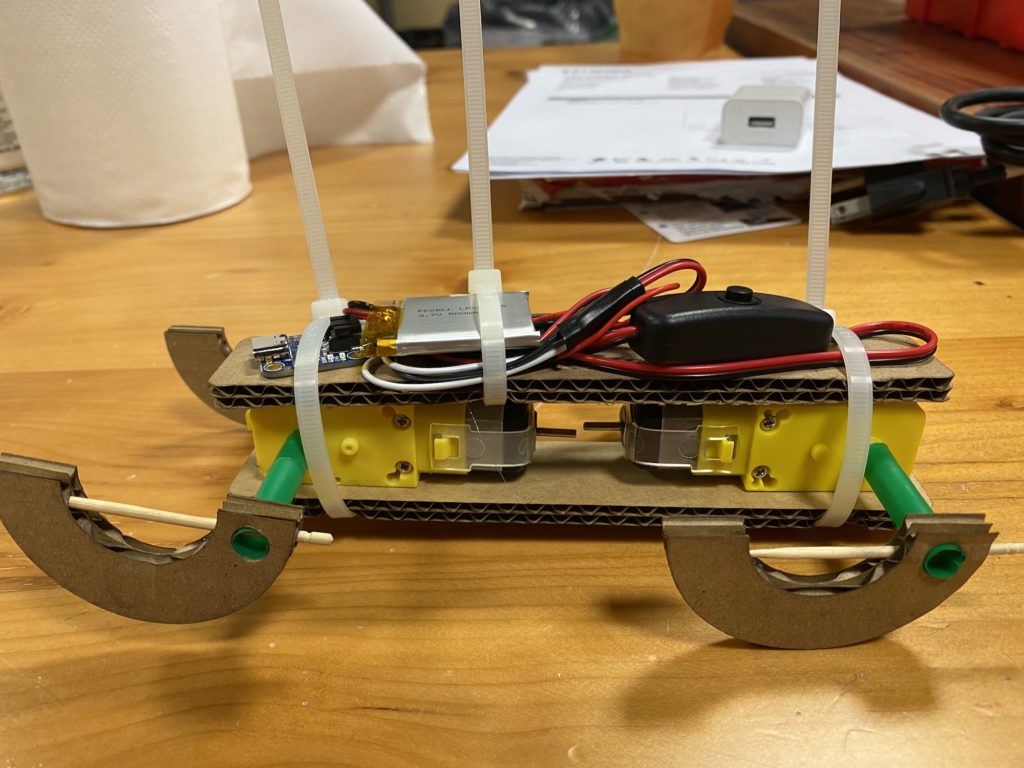
3. Use two zip ties to assemble the bottom plate with the main body.
The zip tie at the front should go over the charger board, and goes behind the shack of the front motor.
The zip tie at the back should go over the excess wire behind the switch, and goes in front of the shack of the back motor.
4. Adjust and fast the zip tie. Cut off extra length.
5. You may add some patterns on to the whegs. This can help increase friction for the whegs.
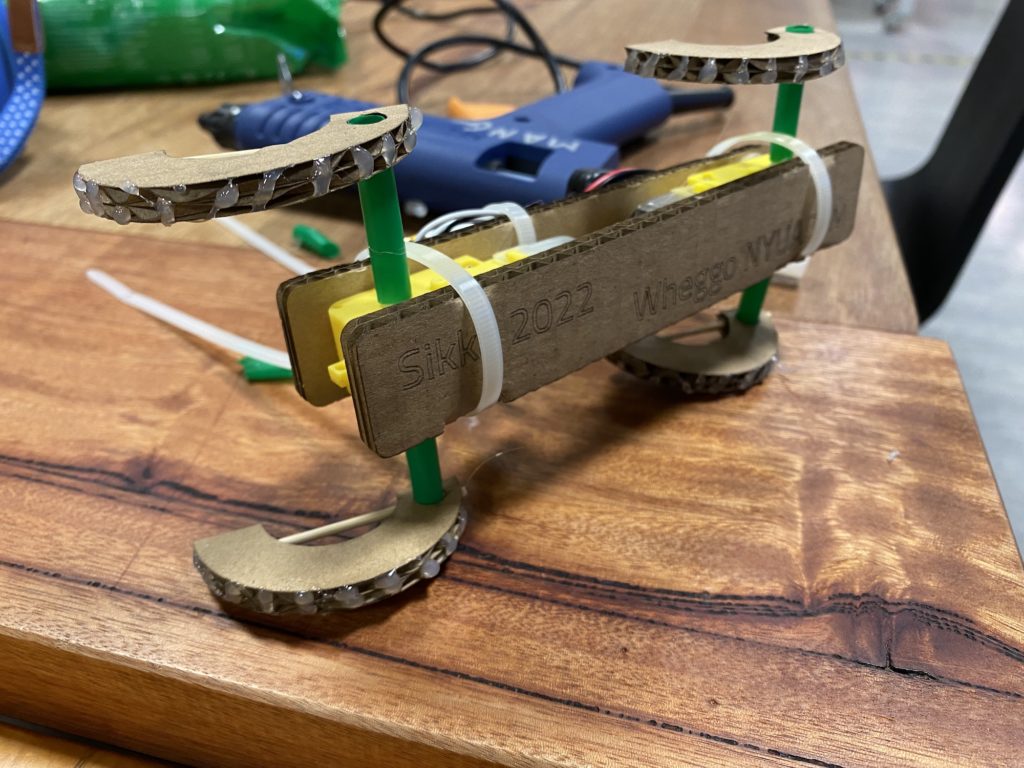
Now set your Wheggo free on different terrains!

0 Comments